Hey, Bertie Bott– Time To Brighten Up Your Beans!!
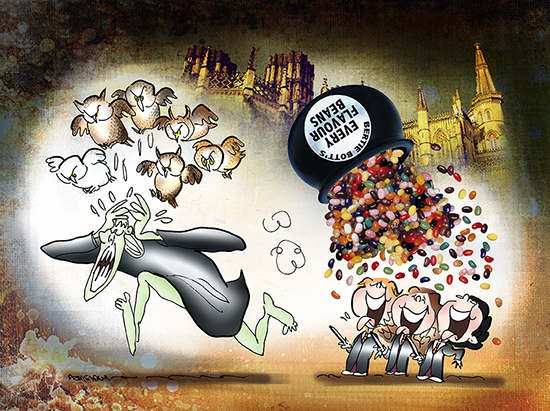
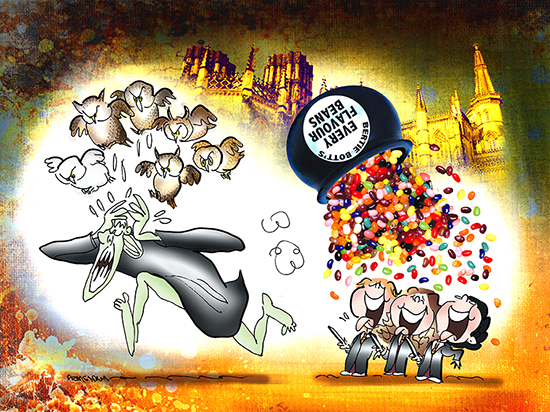
![]() I’m a Harry Potter fan. After seeing these illustration tributes to Harry, I decided to do one of my own. Here’s the final.
I’m a Harry Potter fan. After seeing these illustration tributes to Harry, I decided to do one of my own. Here’s the final.
Scroll down to see how I used Photoshop Layer Groups to boost the color of the Bertie Bott’s Beans without simultaneously affecting the rest of the illustration.
I got to this point in the illustration and decided my beans looked much too drab:
If the beans had all been on one layer, I could have simply clipped a new adjustment layer to the bean layer, thereby restricting the adjustment to that one layer.
However, my beans were spread out on four different layers. If I applied an (unclipped) color adjustment above the topmost bean layer, the color change would be applied to all layers below, not just the four bean layers. I’d wind up with this garish result:

One solution would be to apply four separate sets of identical adjustment layers to each of the four bean layers. That would restrict the color changes to only the bean layers. A more efficient approach is to group the four bean layers together, then apply any adjustments to the group. That’s what I decided to do here.
The three Layer Windows below show the basic sequence: in the first window, we see the four separate bean layers. In the second, I’ve selected those four layers. I then chose Layers > Group Layers. The third window shows the result: the four bean layers are now grouped together in “Group 1.”
When you group layers together, Photoshop gives the resulting group layer a default blending mode of Pass Through. That means any adjustments applied to the group as
a whole will “pass through” the group and also be applied to all layers below the group– which is exactly what I did not want.
How do we solve this problem? Easy: we simply access the Blending Mode pop-down menu and change the mode from “Pass Through” to “Normal,” as shown below. Now any adjustment applied to the group will be restricted to only the layers in the group.
I applied Hue/Saturation and Brightness/Contrast adjustment layers to the group.
Worth noting: when you apply an adjustment layer to a group, you do not apply it above the Group layer. Rather, you apply it inside the Group folder, above the topmost layer in the group. See below.
Here’s a Before and After comparison of my “bean color adjustment.” As you can see, the color change is restricted to the beans. The rest of the illustration is unaffected.
Conclusion: the magic of Photoshop lets anyone be a wizard. Here’s the final again. Boo, Voldemort! Hurrah for Bertie Bott’s Beans!!


Love the illustration!
LikeLike
Thank you for sending your owl to deliver that very kind comment… : ) Very glad you liked the illo, thanks so much for stopping by!
LikeLike
Brighter beans look way more yummy!
LikeLike
That is a very delicious thing to say– just what I’d expect from someone who creates her own magic on stage! : )
LikeLike
I haven’t figured out how to do layers with any photo alteration software.
But that’s great you’re discoveriing its capabilities, Mark.
LikeLike
Jean, it’s always a pleasure to have you stop by– thanks. If I can ever help you out with an image-editing question, please do drop me a line. Photoshop’s the software I know and use, but I think all image-editing programs have certain features in common. Happy biking! : )
LikeLike
I haven’t even attempted to figure out how to use photoshop but I really enjoyed reading and seeing how you developed these illustrations. Layers, blending, and color saturation offer so much to work with but the whole photoshop suite intimidates me. You made it sound so easy in this tutorial that I’m tempted to put learning how to use photshop on my list of new things to do list.
LikeLike
Thanks so much for your kind words, TT, always delighted to see you here.
Intimidated by Photoshop? Join the club! I still feel that way at times, and that’s the truth.
One thought that occurs: you don’t need to learn everything to do certain things. Try googling “Photoshop Actions” sometime. The vast majority of them are photo manipulation effects that one can apply to an image/photo with a single click. Someone else has already put the necessary Photoshop steps together, in sequence. You download these actions to your hard drive, and put them into a certain folder within your Photoshop application program folder. (You can also google and find instructions on how to locate said folder.) You could run these actions (i.e., apply them) to photos and convert the photos to simulated paintings (watercolor, oil, etc). It might be a way to build confidence, and it would give you some new graphics to use on your blogs. Just an idea.
Thanks for your kindness and ongoing support!
LikeLike
Very nice illustrations. Great work!
LikeLike
Many thanks, Kerby. I made it a point to visit your own blog– you are doing great work yourself! Wishing you the best, and thanks again for stopping by! : )
LikeLike
You are good in this… Wow! you’re a genius! Would you play with me sometimes in my Art Game? I wish you would 🙂
LikeLike
Not too many people recognize my obvious genius. I can tell you are a very perceptive person…
I’m not too good at art, but if you ever need advice re brushing, flossing, dental care, well, I’m your man. : )
LikeLike
hhahhha, okay, okay 🙂 🙂 🙂
LikeLike