Steve “Adam” Jobs Offers Eve An Apple In A Previously “Gated” Community
Steve Jobs recently resigned as CEO of Apple. I decided to do a tribute illustration. Here’s the final. Scroll down to see the construction sequence in Photoshop.
I used a Wikimedia Commons image as my starting point. It’s called Eve After The Fall, by Alexandre Cabanel (1823-1889). The image is in the public domain in the United States.
I flipped the image horizontally, scaled it down, and positioned it in the bottom left-hand corner of my work space.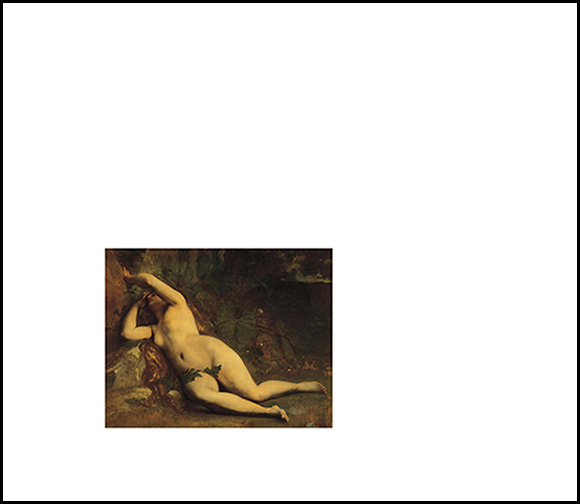
I used the Lasso tool to select the Eve figure, then copied the figure and pasted it into a new layer above the original Background. I then used the Clone Stamp tool, starting with very small Brush sizes, and carefully cloned the background imagery, filling up my work space. 
I found this Adam image by Albrecht Dürer (1471-1528), in Wikimedia Commons. It, too, is in the public domain. I flipped the image horizontally, and used the Pen tool to select the figure minus the head. Then I deleted the background.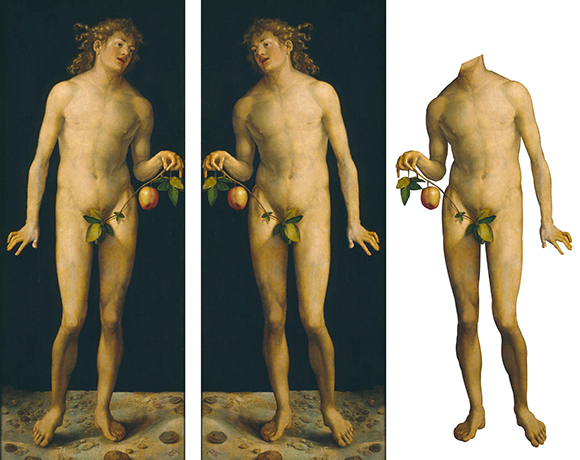
I found a photo of a young Steve Jobs, and applied the Watercolor filter. I used
the Pen tool to select out the head, then used the Liquify filter to reshape some of the features and create a semi-caricature. Finally, I used the Dodge tool on the whites of
the eyes to bring the eyes into sharper focus.
I pasted the Steve head on the Adam body, and immediately noted a huge color conflict.
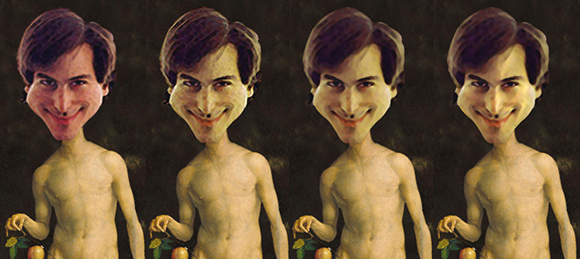
I used a simple Hue/Saturation adjustment to correct same (second image from left below). For me, the most interesting and important part of the construction sequence occurred in the next step: I applied the Noise>Median filter to the head. The Median filter smoothes an image without disturbing its edges.
In this case, the Median filter smoothed (blurred) some things I did not want disturbed: the eyes, nose, and lips. And yet these features appear unchanged after applying the Median filter (third head from left below). How is that possible?
Answer: after applying the Median filter, I used the History Brush to carefully restore just those features to the way they looked before the Median filter was applied. If you’re not familiar with the History Brush, here’s a short tutorial that will give you the general idea. I also found a one-minute video on the History Brush, as well as a one-minute video on the History Palette, which is used in conjunction with the History Brush.
Want to learn more about the Median filter? Here’s a short tutorial which includes
an extra step to reinforce the edges after applying the Median filter. And this tutorial shows how to use a layer mask to shield certain parts of an image from the softening effects of the Median filter– a different way of accomplishing what I used the History Brush for.
Getting back to our construction sequence here: finally, I applied the Dodge tool in Highlights mode to boost the reflected light on the face (fourth head from left below).
I pasted the Steve Jobs figure into my main image. I also pasted in an old Apple logo, which I found on the web and cut out with the Pen tool.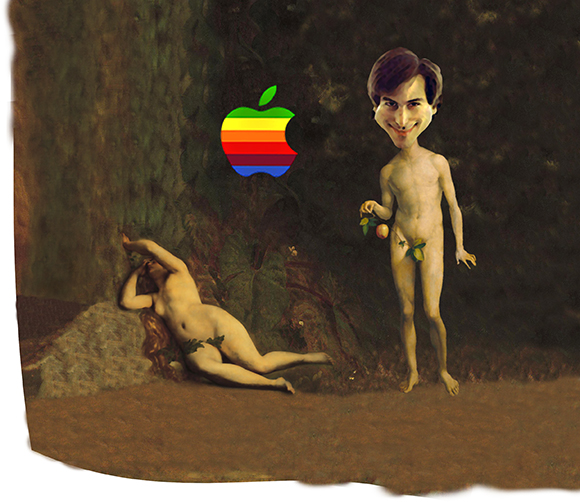
I used the Clone Stamp tool to clone out part of the original apple vine extending across Steve’s hip, and the Pen tool to carefully select and delete the original “Adam’s apple” (pun intended). Then I scaled down the Apple logo and rotated the little apple leaf to fit Steve’s hand.
I also decided at this point that the Eve figure was a little too small, so I scaled it up a bit. Steve’s head is too big for his body, but that’s OK, it’s a caricature and he’s the star of the image.
I found photos of an old computer monitor, a young Bill Gates, and some cracked glass, and “fused” them into the composite image below by arranging them on separate layers and cutting away the unneeded parts. Note: all the layers used to build the monitor image had mode = Normal, except the cracked glass layer which had mode = Color Dodge and opacity = 69%.
I used a Hue/Saturation adjustment to add some light green color to the original white monitor, and a “grunge brush” at 30-50% opacity to splash on some dirt and grime. The trickiest part was using the Skew and Distort transformation tools to change the monitor’s orientation.
Then I pasted the monitor into the larger image.
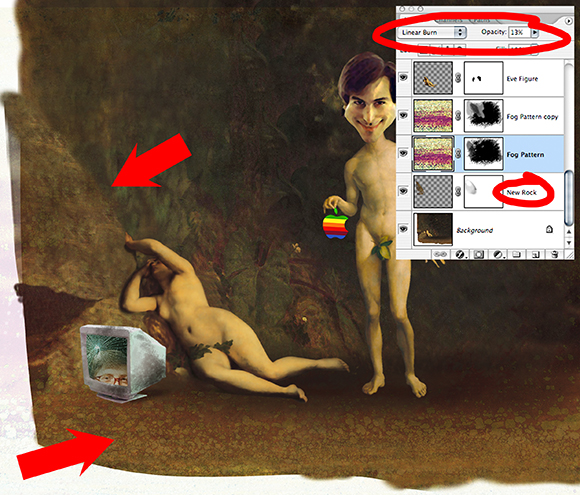
At this point, I suddenly realized that something looked very peculiar: Eve’s upper hand seems to be resting against something– but there’s nothing there! So I used the Clone Stamp tool to carefully build a “new rock” on a separate layer (top red arrow below). Point of info: it is possible to use the Clone Stamp tool to sample something on one layer, and then brush it onto another layer, going back and forth between the two.
I also decided to add some texture to the image (bottom red arrow below). I pasted in
a free texture I had previously downloaded, then duplicated the texture layer. As you can see in the Layers window below, the first texture layer has mode = Linear Burn, and opacity = 13%. The settings for the duplicate texture layer (which aren’t visible below)
are mode = Soft Light, opacity = 32%.
Finally, to finish up, I merged the background elements together. As you can see in the Layers window below, I added three adjustment layers to brighten the background. Then I added a layer mask and used a “streaky brush,” color = Black, and opacity set
to 30-50%, to paint away (rather than erase) the background, until I had a pleasantly sketchy border.
Here’s the final again.
What do you think? Does the image work? Are you a Steve Jobs fan? Was I too hard on Bill Gates? Did you learn anything new about Photoshop? Hope you’ll leave a comment.
And if you enjoyed this post and others, I invite you to subscribe. Just click on the Subscribe button below the Portfolio Thumbnails in sidebar at top right of page.




This is a valuable tutorial. You are obviously a master of image manipulation and your sense of humor rocks!
LikeLike
Because you are such a paragon of good judgement, I must humbly accept your analysis– thanks, TT!! : )
LikeLike
Well done and great tutorial 🙂
LikeLike
Too kind, too kind–! (but I typed that with a big smile on my face) Thanks, Inge– much appreciated! : )
LikeLike
Love this! You have a deliciously wicked sense of humour 😉 Thanks for the fab tutorial too!
LikeLike
Ha! Yes, I’m a wicked guy– probably woulda gotten kicked outta the Garden of Eden for being a bad apple… : )
Many, many thanks for such kind and cheerful support, and very glad you found the tute useful!
LikeLike
LOL!!! It’s amazing!!! 😀 the concept is too much!!! Love and respect to Sir Steve Jobs… Your works are amazing!!
LikeLike
My dear fellow– you are clearly one of the world’s most gracious gentleman! It’s also easy to see that you have exquisite taste in art… : P
Thank you for that lovely comment, I sincerely appreciate it. You are always most welcome here, my friend! : )
LikeLike
🙂
LikeLike
I love this… so brilliant! Very effective illustration… Plus I learned some history about Apple and the Father of the Digital Revolution. Wow! Amazing 🙂 Thank you! mmmwahh!
LikeLike
Thank you, my dear Dolly! That is a very astute analysis, and I must agree with you on every point… : )
Of course, if you wish to see real artistic genius, you should check out all the great work at the Lemons R Us Café… : )
LikeLike
Reblogged this on allaboutlemon-All Around, In, And Out Of My Own Universe and commented:
I love this… so brilliant! Very effective illustration…and wicked sense of humor too… LOL
LikeLike
I am deeply honored, that’s why I put on a tuxedo to type this– thank you, dear Dolly!! : )
LikeLike
Reblogged this on TeMeMi.
LikeLike
Many thanks. Glad you enjoyed it, and I appreciate your support!
LikeLike