Eating Peas, Kicking The Can, And The Road Not Taken
During the recent debt ceiling debate, President Obama admonished Congress
that it was time to “eat our peas.” Easier on the teeth than “biting the bullet,” I guess.
Back in March 2011, the Congressional Budget Office estimated that U.S. budget deficits would total $9.5 trillion over the next 10 years. The CBO estimates that the new debt ceiling deal will cut federal spending by $2.1 trillion over the next decade. Which means the deficit will “only” grow by about $7.4 trillion from 2012-2021. Which means the deal simply “kicks the can down the road,” and puts off any hard fiscal choices until after the 2012 election.
I thought of Robert Frost’s famous poem, The Road Not Taken– which inspired the following comment. Scroll down for a quick look at one of Photoshop’s little-known tools: the Copy Merged command, which I used as a last step in the illustration.
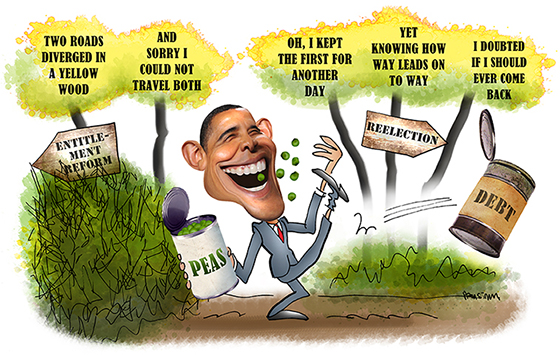
I had finished the illo, and it was time to “tidy up” the borders. As you can see in the unedited image below, the tangled shrubbery in the lower left-hand corner projects out
a bit too far, spoiling the symmetry. I had used eight separate layers to “build up” the shrubbery. Using Copy Merged gave me a way to edit all the layers simultaneously, without flattening the document.
Copy Merged makes a flattened copy of the selected portion of all the visible layers in
a document. You can then paste that flattened copy anywhere you want– back into the same document, a different existing document, or an entirely New Document.
This very compact slideshow shows the basic steps. (Give it a moment to load, it runs automatically.) 1) make the selection (the part of the layered document you want to copy) 2) choose Edit > Copy Merged 3) paste the flattened copy wherever you want it (in the slideshow, it’s pasted into a new untitled document).
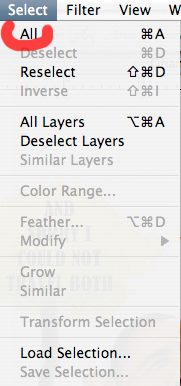
You have to make a selection first– otherwise you will find the Copy Merged command grayed out and unavailable. Here, I simply chose Select > All.
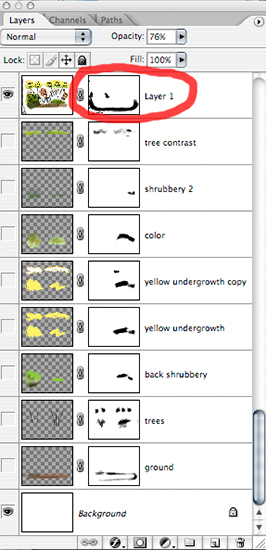
I selected Edit > Copy Merged, which copied all the visible layers in my document. I then clicked on the topmost of the eight shrubbery layers, and selected Edit > Paste, which pasted in the Copy Merged layer above the topmost shrubbery layer (the pasted-in layer is Layer 1 in the Layers Window below). I then “clicked on the eye” in all eight shrubbery layers, making them invisible.
Why did I do that? Because I wanted my Copy Merged layer (Layer 1) to “stand in” for the shrubbery layers when I edited that bottom left-hand corner. I didn’t want the other layers to be revealed underneath the Copy Merged layer.
Because the Copy Merged layer is just another layer, it can have a layer mask. To add the mask, I chose Edit > Add Layer Mask > Reveal All. Then, with the mask selected, I used a splatter-type brush and the color Black to paint away (mask) the excess shrubbery. You can see these black paint strokes in the mask thumbnail in the Layers Window below:
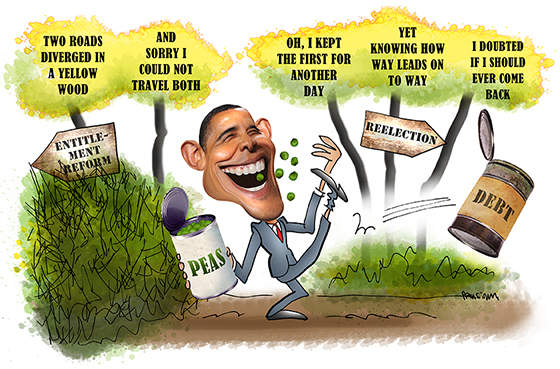
Here’s the final again, with all the shrubbery and ground area neatly squared up. 


Too bad Obama couldn’t square up the deficit as efficiently as you squared up your illustration!
LikeLike
Ha!! Yes, if he spent more time using Photoshop and less time eating peas, we’d all be better off! Many thanks for the visit, Margie, and a truly great quip!
LikeLike