Chrome, Chrome On The Range
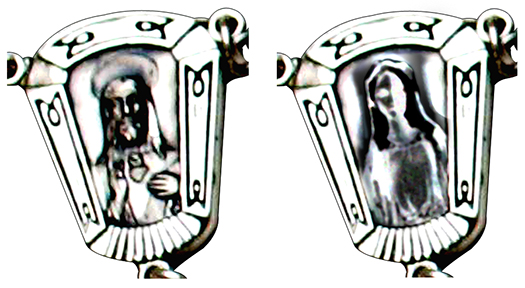
I needed to construct a rosary for a recent assignment from the Holy Childhood Association. I found a nice close-up of the part of a rosary known as the center or centerpiece, which contained an image of the Sacred Heart of Jesus. I needed
to substitute an image of the Virgin Mary. Here are the Before and After images. Scroll down to see how I made the change.

I began with a color photo of a statue of the Virgin Mary. I clipped it out with Photoshop’s Pen tool, desaturated the image, then applied a white to black gradient at low opacity from top to bottom, to give the image some extra contrast.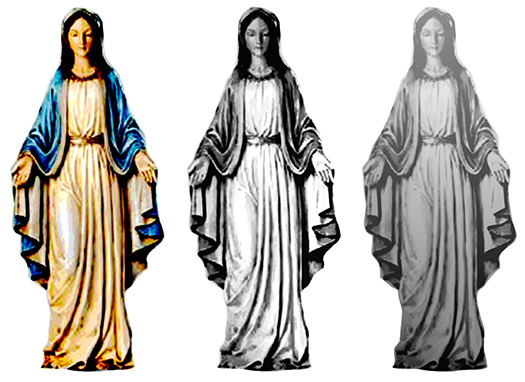
Photoshop does have a Sketch>Chrome filter, but I found it next to useless. I used the Curves adjustment tool instead. There’s no “right answer” in this case. One has to experiment with configurations that resemble the one shown below.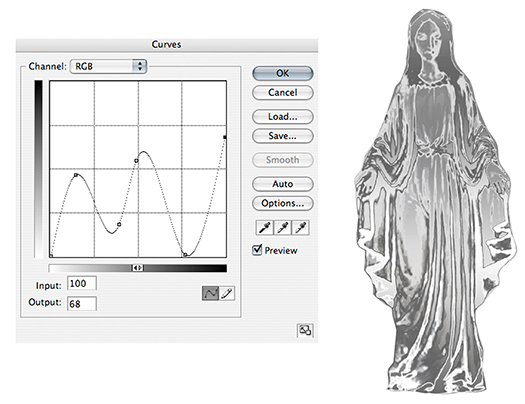
Applying Curves a second time really boosts the chrome effect. After applying Curves,
I used the Burn tool around the edges to add a bit more contrast. You can see how the main folds are a bit darker in the image on the right below.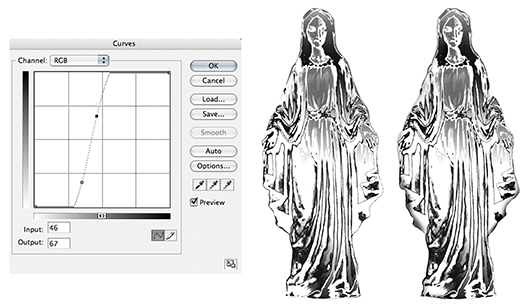
Next I copied and pasted the chromed image into the rosary centerpiece image, placing it on a separate layer beneath the centerpiece. Then I scaled it down and rotated it into position.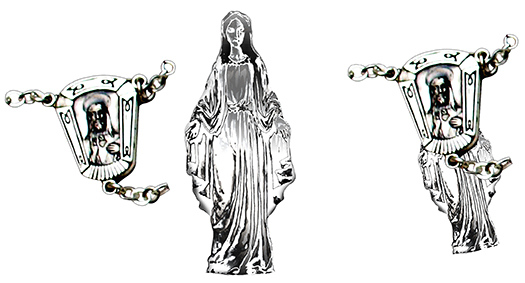
I applied a Layer Mask to the top image, then selected the innermost image area of the centerpiece. Using color Black and a soft airbrush at low opacity, I brushed away the selected portion of the mask to reveal the Mary image underneath.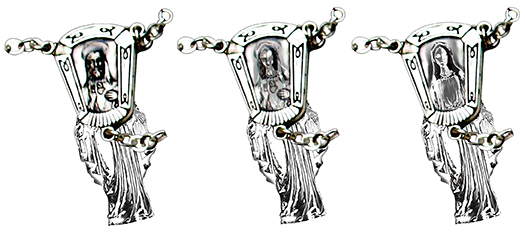
Final steps: I applied a 2-pixel Gaussian Blur to the Mary image, used the Burn tool to darken it a bit, applied the Texture>Grain filter, Type = Contrasty, and used a soft brush at reduced opacity to add a few spot touches of blue and green.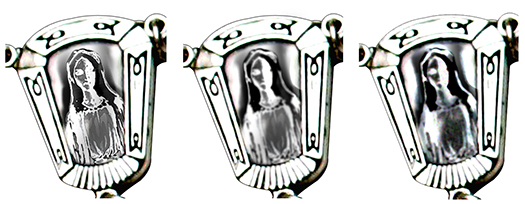
Here’s a close-up compare of the Before and After images: