Andy Warhol Meets Film Noir: Biff, Bang, Pop!
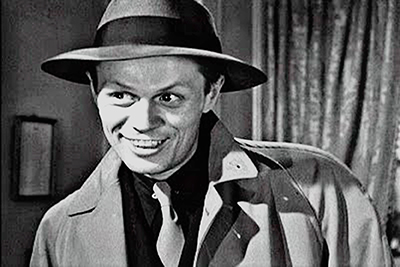
Here’s a Photoshop technique for transforming a B&W photo into a bright pop-art image. It restricts the colors to a very narrow range (in this case, yellow-orange). I began with a B&W movie still of Richard Widmark in his movie debut, playing giggling killer Tommy Udo in the 1947 film noir classic, Kiss Of Death: I sharpened the image (Filter>Unsharp Mask, Smart Sharpen), then lightened it a bit (Image>Adjustments>Curves):
 Then I changed the Mode from Grayscale to Indexed Color (Uniform) to narrow the tonal (color) range:
 I opened the Color Table dialog box (Image>Mode>Color Table…) and chose Table: Grayscale from the pop-down menu:
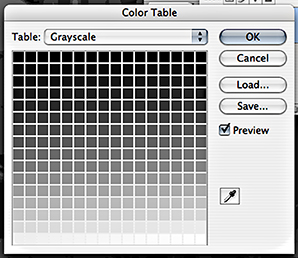 I selected all 256 squares (grayscale tonal values) by running the cursor over them from top to bottom. Making this selection causes the Color Picker window to open, and I was prompted to select my “first color.” (The idea here: pick a first and last color and thereby define a range of 256 colors between those two values. These new color values will replace the original grayscale values.)
 I adjusted the slider and chose a light color (yellow-orange). This caused a new Color Picker window to open, and I was prompted to pick my “last color.”
 I selected a very dark color by clicking at the bottom of the Color Picker window. My Color Table then displayed the 256 color values between my first and last colors:
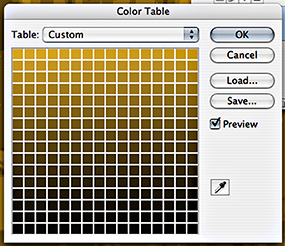 I clicked OK to close the Color Table. My grayscale image was then converted to the corresponding yellow-orange color values:
 I then changed the Mode from Indexed Color to RGB. This allowed me to duplicate the Background Layer:
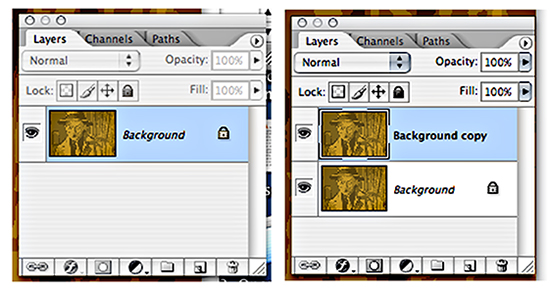 Keeping the Background Copy selected, I opened the Threshold dialog box (Image>Adjustments>Threshold). I then experimented with the Threshold Level, moving the slider back and forth, until I got a nice clean contrast that wasn’t too light or too dark. (A level of 128 worked here, but this will vary somewhat depending on the image.)
 I used the Magic Wand (with the Contiguous box unchecked) to select all the white areas on the Background Copy.
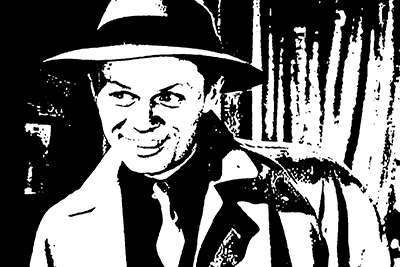 I pressed the Delete key to delete the white areas and allow the color from the Background Layer to show through. Then I flattened the image by choosing Flatten Image from the pop-down menu in the Layers palette:
 Finally, I pressed the ‘D‘ key to set my Foreground Color to Black and used the Brush and Pencil tools to black-out some of the remaining (and distracting) yellow areas, and give the image a more high-contrast, pop-art look. By accident, I discovered I could retain a small section of the curtain in the background and make it look like prison bars– the perfect backdrop for bad boy Tommy Udo!


