Pardon, May I Reposition Your Eye? It’s Slightly Out Of Focus
I wanted to do a tribute to 1960s era pro golfer Mason Rudolph who died in April, 2011, at age 76. His thick-framed eyeglasses made him look like an accountant, but he was one of the most consistent players on the tour: he made the cut in 409 out of 430 career starts, and once went 105 consecutive tournaments without hitting a ball out of bounds. Funny to think golf pros once looked like average guys.
I’ll do a future post on the tribute illustration itself. This post involves preliminary work. I could only find a single fuzzy B&W close-up of Mason Rudolph. I needed to clean it up and enhance it. Scroll down to see the step-by-step sequence.
The original photo was a grayscale image at 300 dpi. I made a copy, and changed the mode to RGB. I sharpened the photo using Unsharp Mask, then applied a red Photo Filter (color adjustment). I always duplicate the layer (image) before sharpening or applying a color adjustment.
I wanted Mason’s eyeglasses to be a prominent part of the tribute illustration. For
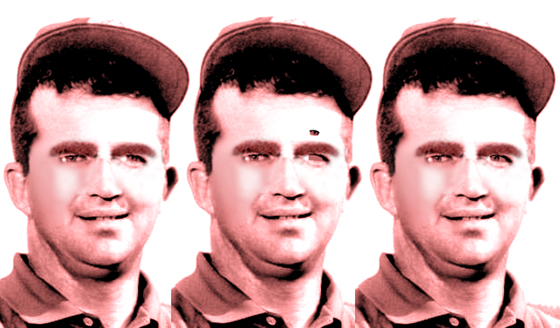
that reason, I needed to build a new pair that I could easily manipulate. I began by carefully cloning out the original glasses in the colorized photo. I used the Clone tool with a small soft brush– about 10 pixels. Then I used a soft Brush set to Watercolor, opacity roughly 28%, flow roughly 24%, to smooth and blend the cloned areas, most noticeably on his left cheek.
At this point, I noticed his right eye seemed to be out of focus. I decided to fix it. I
used the Pen tool to select the pupil, and moved it onto a separate layer. I used the Eyedropper to sample nearby color, and brushed a line of this color over the white
of the eye. Then I moved the pupil back into position, nudging it slightly to the left. I
used the Pencil to add a single pixel of white to the pupil– and suddenly the eyes sprang sharply into focus. 
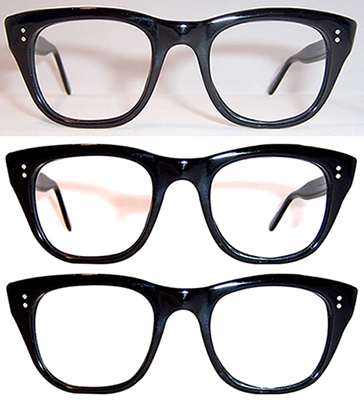
I found a nice photo of some old-fashioned, heavy black-framed glasses. I sharpened the image using Unsharp Mask, then applied a Levels adjustment to deepen the blacks and eliminate most of the grays. I used the Pen tool to select, then delete the area inside the two eyepieces.
I also needed a stem piece, and for this I used a second photo. My Levels adjustment failed to eliminate all the yellow, so I desaturated the image. Then I used the Pen tool
to select out the stem piece.
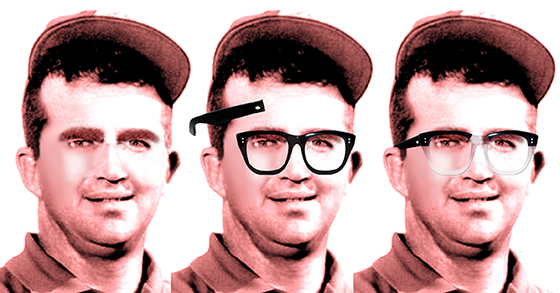
I pasted the glasses and the stem piece onto the Mason image, putting them on separate layers. I needed to make the lower part of the glasses translucent.
I selected this area and then placed it on its own layer by pressing Command-J (PC: Control-J). I discovered I could achieve the translucent effect by changing the blending mode of this new layer to Color Burn, and lowering the opacity.
I used the Transform tools (Rotate and Distort) to bend the stem piece into position. I had to fine-tune the “fit” with some careful nudges using Photoshop’s Liquify filter.
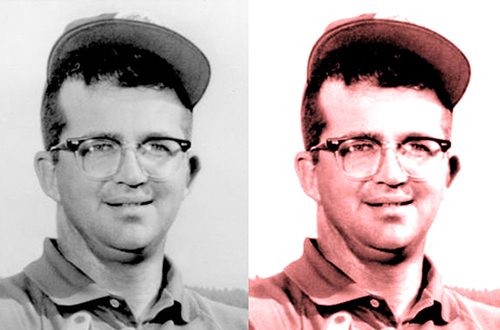
Here’s a compare showing the original B&W photo and the final enhanced image.
![]()
![]()


Golly, Mark – what a cool and intricate process!
LikeLike
Yes, all those years in med school finally paid off, despite my cutting all my classes… : )
Thanks, as ever, Mia, for your kind support!
LikeLike